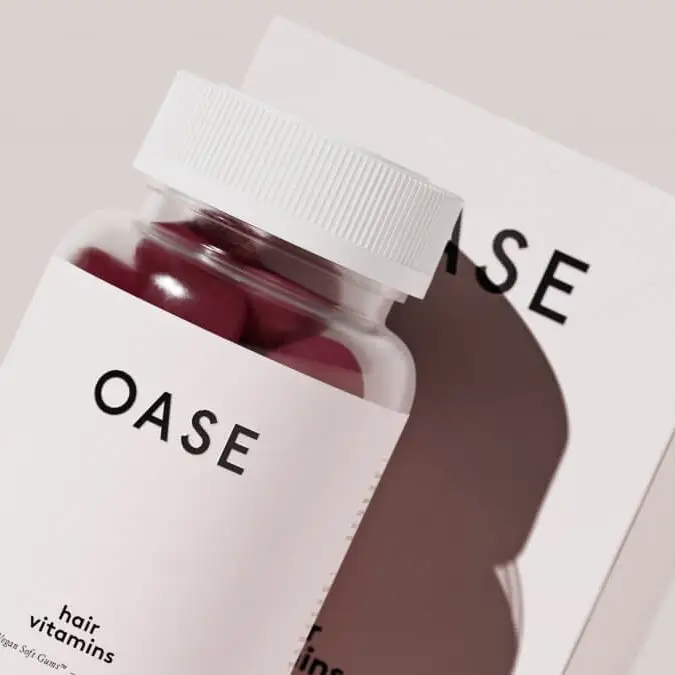
Enhance your feel and aesthetic with features such as luxury board, sleek foiling, embossed logos, or spot UV finishes create amazing printed packaging today.
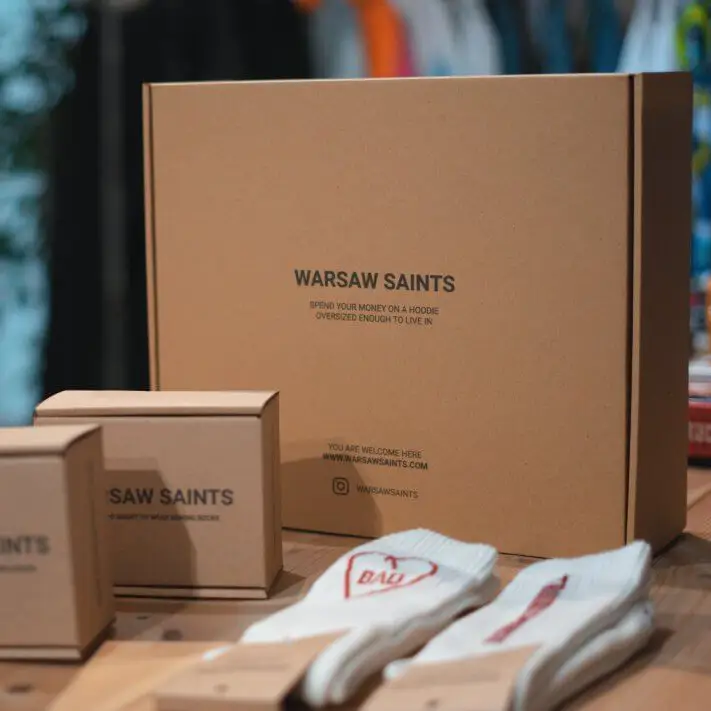
Custom boxes · printed vessels · joined-up production
Custom packaging and bespoke printed boxes, made around your product.
Build the box, insert, print finish and primary vessel as one considered packaging system—from the first dimensions and artwork review through to manufacture and delivery.
Move through real examples of bespoke boxes, fitted inserts and printed plastic, glass and metal vessels. Each project links directly to the relevant guidance below.
Rigid presentation / fitted bottle
01 / 07
Rigid presentation / fitted bottle
Structure, reveal and finish working as one premium pack.
A rigid format creates space for a deliberate opening sequence, a secure product fit and controlled foil or embossed detail.
Project 1 of 7: Structure, reveal and finish working as one premium pack.
Start with what goes inside
Bespoke means more than putting a logo on a box.
The most useful packaging brief starts with the product, not a preselected template. Fit, protection, opening, printing and packing all need to support the same outcome.
Custom packaging can change the dimensions, structure, material, insert, closure, print area and finish. It can also coordinate the vessel inside with the carton, carrier or presentation box around it.
01
FitInternal size, product orientation, weight and movement.
02
ProtectionBoard strength, dividers, cavities and transit handling.
03
PresentationOpening sequence, product reveal and how components are removed.
04
PrintArtwork coverage, colours, legibility and material compatibility.
05
PackingHow the pack is assembled, filled, closed, stored and delivered.
Product, vessel and insert designed as one systemOrganised set · fitted cavitiesMultiple units · controlled spacing
Custom printed boxes
Choose the box format by what it needs to do.
A presentation box, folding carton, ecommerce mailer and retail display solve different problems. Structure comes first; the print and finish should make that structure easier to recognise and use.
Production note / 01
Before artwork: confirm the internal dimensions, product orientation, opening face and how the pack will be filled.
Premium presentation
01 / Box format
Rigid presentation boxes
For premium gifts, launches and high-value products where structure, opening sequence and presentation need to work together. Discuss board wrap, closure, insert, edge detail and how the product is removed.
A versatile route for retail products, supplements, skincare, bottles and secondary packaging. Dimensions, tuck style, board, print coverage and any window or internal support should be defined before artwork is finalised.
Designed around transit, packing speed and the unboxing moment. The product, void space, insert, closure, tear strip and print inside the lid can all be considered as one practical system.
For products that need to travel, open and present cleanly at retail. Consider unit count, shelf footprint, tear-away areas, replenishment and which faces remain visible after the outer section is removed.
Hold each component where the customer expects to find it.
The insert is not an afterthought. It influences protection, presentation, packing time, material use and how easily the product can be lifted out. Send accurate dimensions and, where possible, physical samples.
Single-product fitControl movement and create a deliberate reveal.
Multi-product setsOrganise different sizes, accessories or a usage sequence.
Transit and presentationBalance protective support with an easy removal experience.
Structure before assemblyFitted cavitiesRepeated-unit spacing
Packaging printing and finishes
Use print and finish to clarify the brand—not to hide a weak structure.
The correct route depends on the substrate, artwork, colour count, print area and handling expectations. These are the main options to discuss when shaping a production brief.
Production note / 02
Supply vector logos, identify critical brand colours and separate foil, embossing or spot-finish artwork onto clearly named layers.
Foil and embossing · detail controlled by artwork and boardVessel and carton · coordinated metallic detailMulti-colour print · display format
01
One-colour and spot-colour print
A focused route for precise logos, technical information or restrained brand systems. Ink, substrate colour and coverage all affect the finished appearance.
02
Multi-colour and full-colour print
Useful for illustrations, gradients, photography and complex brand palettes. Artwork, colour expectations and registration need reviewing against the chosen material and process.
03
Foil and metallic detail
Adds controlled reflective detail to logos, typography or borders. Foil colour, coverage, position and the underlying surface should be assessed together.
04
Embossing and debossing
Raises or presses selected artwork to introduce a tactile feature. Detail size, board construction and proximity to folds can influence what is achievable.
05
Spot gloss and UV effects
Contrasts selected glossy areas against a more restrained surface. It works best when the highlighted artwork has a clear purpose rather than covering every element.
06
Matte, gloss and coated appearances
Surface sheen changes colour, touch and perceived depth. The right route depends on material, handling, target look and any printing that needs to sit above or below the finish.
Printed vessels
Plastic, glass and tin can carry the brand before the outer box is opened.
Primary packaging needs its own material and decoration decisions. When the vessel and outer packaging are developed together, colour, hierarchy, protection and shelf presentation can feel intentional across the whole range.
Production note / 03
Component drawings or physical samples help confirm curvature, seams, closures, printable area and the fit inside any secondary carton or insert.
Direct-to-container decoration can reduce reliance on a separate label and create a clean, integrated surface, but the artwork must suit the vessel shape and available print area.
Coordinated secondary packaging connects the jar, bottle, tin or can with a carton, carrier, insert or presentation box that protects it and controls how it is introduced.
01 / Material route
Plastic
Printed plastic jars, tubs, bottles and pumps
Plastic vessels offer a wide range of shapes, colours, closures and dispensing formats. The print route should be considered with the resin, curvature, available print area, cap or pump and how the pack will be handled in use.
Useful starting informationTell us the vessel material, capacity, colour, closure, artwork colours and required print area.
Printed jar · solid colour vesselPump bottle · multi-colour brandingSupplement tub · wraparound informationGradient colour · high-impact print
02 / Material route
Glass
Printed and coated glass bottles and jars
Clear, frosted and coloured glass can create very different outcomes from the same artwork. Shape, wall colour, coating, print position, closure and product visibility should be reviewed as one composition.
Useful starting informationTell us whether the glass is clear, coloured or frosted, and share the finish reference you want to achieve.
Printed tins, cans and coordinated outer packaging
Metal vessels can work as the primary branded pack or as one part of a larger presentation system. Shape, seam, lid, print area and the way the tin or can sits inside a carrier, carton or insert all matter.
Useful starting informationTell us the existing component specification or share a physical sample so decoration and secondary packaging can be considered together.
Colour can cover the vessel, sit on the surface—or do both.
A strong brief separates the base colour or coating from the printed graphics applied over it. Material, shape, colour reference, artwork and expected handling all influence the route to test.
01 / Spray-coated appearance
Build the base colour and surface character.
Solid colour, frosted, matte, gloss, gradient and metallic appearances can change how glass or a suitable vessel reads before any logo is applied. Coverage, masking, finish reference and closure colour should be defined together.
Share a physical finish reference or a clear colour target.
Define full, partial or gradient coverage.
Confirm where printing must sit over or beside the coating.
Multi-colour artwork can combine typography, illustrations and gradients, but every colour and detail must stay legible on the available surface. Curvature, seams and the visible product can all change the result.
Separate colours and identify critical brand matches.
Keep fine detail away from difficult curves or interrupted areas.
Review a proof or sample when registration and colour are critical.
Gradient colour field · printed plastic bottle
Frosted glassMulti-colour plasticVessel plus sleeveHigh-contrast colour
Compare the routes
Match the format to the product and the job it has to do.
This is a starting point, not a fixed specification. A physical product, component sample or accurate drawing helps the team assess the most appropriate structure and decoration route.
Packaging route
Typical purpose
Structural priority
Decoration focus
Rigid presentation box
Premium sets and gifting
Fit, closure and opening sequence
Wrap, foil, embossing and insert
Folding carton
Retail products and bottles
Efficient structure and shelf face
One-colour or multi-colour print, windows and varnish
Mailer box
Ecommerce and subscription
Transit protection and packing speed
Exterior and interior print, tear strip and messaging
Display pack
Pouches, sachets, cans and retail units
Shelf footprint and tear-away behaviour
High-visibility branding and product organisation
Plastic vessel
Beauty, wellness and supplements
Material, shape, closure and handling
Direct print, label or coated-colour route to assess
Glass vessel
Skincare, candles, fragrance and premium products
Clarity, frosting, coating and closure
Screen/direct print, coating and metallic detail to assess
Tin or can
Food, drink, gifting and reusable packs
Lid, seam, print area and secondary fit
Printed surface plus carrier, carton or fitted insert
From brief to delivery
A clearer brief creates a better route to manufacture.
You do not need every answer before contacting us. Start with the product and the outcome; the next decisions can then be made in the right order.
Dieline · packed format · physical product
A production brief, not a moodboard
Connect the visual idea to the dimensions, material and packing sequence.
Input
Product, measurements, quantities and artwork status.
Decision
Structure, vessel, insert, print route and finish.
Approval
Fit, colour, artwork position and production-ready files.
01
Brief the product
Share the product dimensions, weight, vessel or box requirement, quantity, target market and how the pack will be filled and used.
02
Define the route
We assess the structure, substrate or vessel, insert, print area, closure and finish references needed to build a workable specification.
03
Review artwork and finish
Artwork is checked against dielines, curved surfaces, colour count, legibility, folds, seams and the limitations of the chosen material.
04
Sample and approve
Where the project requires it, a sample or production proof helps confirm fit, opening, colour and finish before the main run moves forward.
05
Manufacture and deliver
Approved packaging moves into production, quality review and delivery in the format agreed for your filling, packing or launch plan.
What to send with your enquiry
Seven details that make the first conversation more useful.
Questions to answer before a custom packaging project moves forward.
If your product or finish is unusual, send photographs or a sample. The earlier the physical requirements are understood, the easier it is to assess a suitable route.
Bespoke packaging is designed around a specific product, brand and route to market rather than selected as an unchanged stock format. Dimensions, structure, insert, material, print, finish, opening sequence and delivery format can all form part of the brief.
What types of custom printed boxes can Prest help me explore?
Projects can include rigid presentation boxes, folding cartons, bottle cartons, mailer boxes, ecommerce packaging, display packs, sleeves, carriers and fitted multi-product sets. The right route depends on the product, quantity, presentation goal and packing process.
Can you design packaging inserts around my product?
Yes, an insert can be considered as part of the structure. Accurate product dimensions, weight, orientation and the order in which items should be removed are important starting points for assessing cavities, dividers or supports.
Can plastic bottles, jars and tubs be printed?
Many plastic components can carry direct print, labels or other decoration, but suitability depends on the exact plastic, shape, surface, print area, artwork and handling requirements. Share the component specification or a physical sample for assessment.
Can glass bottles and candle jars be spray coated and printed?
Coated, frosted, clear and printed glass appearances can be explored. The appropriate route depends on the glass, shape, closure, colour reference, coverage, artwork and intended use. A finish sample is useful when colour or tactile appearance is critical.
Can tins and cans be included in a custom packaging project?
Yes. A tin or can can be considered as the primary branded component and then coordinated with a carton, carrier, display pack or fitted presentation box. Existing component specifications help define print area and fit.
Is multi-colour direct printing possible?
Multi-colour decoration can be assessed for boxes and suitable vessels. The number of colours, registration, gradients, fine detail, surface curvature and substrate all influence the recommended process and artwork setup.
What information do you need to quote custom packaging?
Send product dimensions, material or vessel specification, quantity, artwork status, colour and finish references, packing method, delivery destination and target timing. Photographs or physical samples can help explain fit and presentation requirements.
Can the box and printed vessel be designed as one coordinated pack?
Yes. Treating the vessel, secondary carton, insert and outer presentation as one system helps align colour, hierarchy, product protection and the opening experience.
Do I need finished artwork before contacting Prest?
No. You can start with the product, dimensions, brand direction and finish references. If artwork already exists, include it so print areas, colour count and technical suitability can be reviewed earlier.
Your product is the starting point
Bring the box, bottle, jar, tin—or just the idea.
Share the product, dimensions, artwork status and finish you are aiming for. We will help turn that information into a clearer custom packaging brief.